Building a Delta Kite: A Beginner's Guide
Welcome to the wonderful world of kite building! This guide will take you through the process of constructing a classic delta kite, a perfect project for beginners and families. The delta shape is strong, stable, and relatively easy to build, offering a rewarding first kite building experience. Let's get started!
Materials You’re Going to Need
- Kite Spars: Two wooden dowels (approximately 3/16” or 4.8mm diameter) - one approximately 36 inches (91cm) long (the spine) and one 30 inches (76cm) long (the spreader). You can find these at craft stores or hardware stores.
- Kite Covering: Ripstop nylon, Tyvek, or strong paper (like kraft paper) - approximately 24 inches x 36 inches (61cm x 91cm). Ripstop nylon is ideal for durability.
- Bridle Line: Strong kite string or thin nylon cord (approximately 15-20 feet or 4.6-6 meters).
- Flying Line: Approximately 100 feet (30 meters) of strong kite string.
- Tape: Strong packing tape or equivalent.
- Scissors or Craft Knife: For cutting the kite covering.
- Ruler or Measuring Tape: For accurate measurements.
- Pencil or Marker: For marking measurements.

Step 1: Preparing the Kite Frame
- Mark the Spine: Lay the 36-inch spine dowel horizontally.
- Mark the Spreader: Lay the 30-inch spreader dowel. Mark a point on the spine dowel that is 6 inches (15cm) from each end of the spine. This is where the spreader will be secured.
- Secure the Spreader: Center the spreader between the two marks on the spine. Use tape to securely attach the spreader to the spine. Overlap the tape generously.
- Check for Stability: Ensure the spreader is perpendicular to the spine as much as possible. A slight angle is okay.
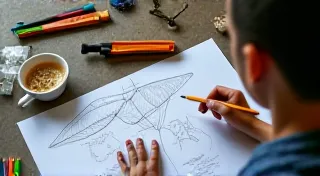
Step 2: Cutting the Kite Covering
- Create the Pattern: The shape of a delta kite resembles a triangle with a slightly curved front edge. Lay your frame on top of your chosen kite covering material.
- Draw the Shape: Draw the delta kite shape around the frame, leaving a 1-2 inch (2.5-5cm) border all the way around. This border will be folded over the spars.
- Cut the Covering: Carefully cut along the drawn lines.
Step 3: Assembling the Kite
- Fold and Tape: Fold the edges of the kite covering over the spars and tape them securely. Make sure the spars are centered within the folded edges. Work your way around the entire kite.
- Reinforce Corners: The corners are stress points. Reinforce them with extra tape.

Step 4: Attaching the Bridle
- Bridle Attachment Points: On the spine, make a mark approximately 2 inches (5cm) below where the spreader intersects the spine on either side of the spine.
- Create the Bridle Loops: Create two small loops in the bridle line, one at each marked point on the spine. Secure them with tight knots.
- Connect the Loops: Bring the two loops together and connect them with a small piece of bridle line. This forms the main bridle.
- Adjust the Bridle: The position of this connecting piece is crucial for flight. Start with it roughly in the middle of the line connecting the two loops. This will be adjusted later for optimal flight.
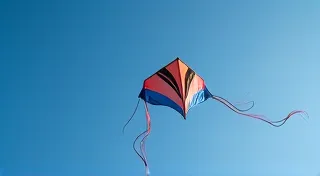
Step 5: Flying Your Delta Kite!
- Find an Open Space: Choose a wide-open area, free of trees, power lines, and other obstructions.
- Wind Conditions: Delta kites fly best in moderate winds (around 8-15 mph or 13-24 km/h).
- Launch the Kite: Hold the kite up into the wind. Gently pull on the flying line to launch the kite.
- Bridle Adjustment (Important!): If the kite dives, move the bridle connection point *up* the line connecting the two loops. If the kite stalls and doesn't fly well, move the connection point *down*. Small adjustments make a big difference.

Building a kite is a rewarding experience. Experiment with different materials and designs to create your own unique kites! Happy flying!